Managing Multiple GitHub Accounts on a Single Device with SSH
Juggling multiple GitHub accounts for work, personal projects, or open-source contributions? This guide will be your one-stop for managing them efficiently! We’ll delve into the methods for using various GitHub accounts seamlessly on a single device.
Table of content
- Generating SSH key for multiple accounts
- Adding the generated public SSH key to Github
- Setting up the SSH config file
- Clone the repository
- Queries and Doubts
Generating SSH key for multiple accounts
- Open Terminal
- Generate SSH keys for all the accounts using the given command.
ssh-keygen -t rsa -C <email> -f <username-1>Substitute the placeholders ‘email’ and ‘username’ with your respective personal, work or alternate email addresses, and assign a unique username to each for identification purposes
Example-
ssh-keygen -t rsa -C "personal@gmail.com" -f "personal-github" // for personal account

ssh-keygen -t rsa -C "work@work.com" -f "official-github" // Another github account
Note — You can generate the SSH keys like this for all your accounts.
3. Upon pressing enter, you’ll be prompted to enter a passphrase. This additional security measure is optional; if you choose not to set it, simply proceed. However, if you wish to implement it, refer to the provided documentation for guidance.
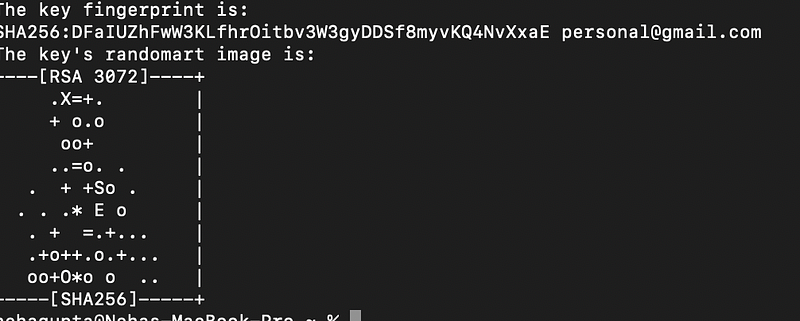
4. You can see the generated key on your terminal like this.
Adding the generated public SSH key to GitHub
- Copy your public key
cat ~/.ssh/neha-personal.pub
// this command will copy the public key to your clipboard
Update — If prompted with zsh: no such file or directory:\users\test then generate it using given command
ssh-keygen -t rsa -b 4096 -C "your-email@example.com"
// When prompted to "Enter file in which to save the key," enter: the location you get error in
// Enter the location to save the file- ex given below
/Users/test
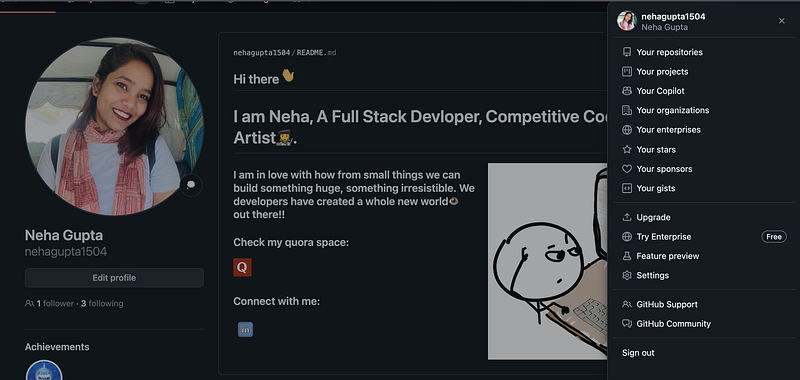
// now use the pbcopy command2. Go to your GitHub account. Click on your image icon on the top right-hand side corner.
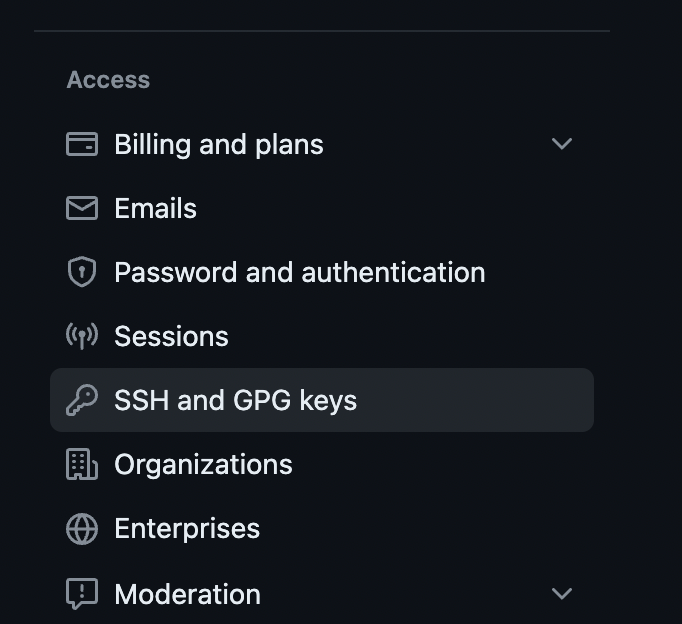
3. Go to settings. Click on SSH and GPG keys under the access tab
4. Click on new SSH key button. Give some title, paste the key and save it.
Setting up the config file
Now we need to add this SSH configuration to the SSH Config file.
1. Start the ssh-agent in the background. If you see the agent pid it means the SSH agent has successfully started.
$ eval "$(ssh-agent -s)"
> Agent pid 50603
2. Check if your ~/.ssh/config file exists
$ open ~/.ssh/config
> The file /Users/YOU/.ssh/config does not exist.
3. If it doesn’t exist then create one
touch ~/.ssh/config4. Now open your ssh config file using the earlier open command.
5. Once the file is opened, set your ssh key details in it.
/*
Host <username>
 HostName github.com // If you want to use any account frequently, then save the hostname to github.com only
 IdentityFile <file_location>
 IdentitiesOnly yes
 UseKeychain yes // only add this line if you've setup passphrase
*/
Host personal-github
 HostName github.com
 IdentityFile ~/.ssh/personal-github
 IdentitiesOnly yes

Host official-github
 HostName github.com
 IdentityFile ~/.ssh/official-github
 IdentitiesOnly yes
Note: If you see aBad configuration option: usekeychainerror, add an additional line to the configuration's'Host *.github.comsection.
Host personal-github
 IgnoreUnknown UseKeychain
6. Adding SSH private key to SSH Agent
ssh-add --apple-use-keychain ~/.ssh/<filename>

// example
ssh-add --apple-use-keychain ~/.ssh/personal-github
Note: remove this keychain flag — apple-use-keychain if you’re not using passphrase.7. Test the connection
$ ssh-keyscan github.com >> ~/.ssh/known_hosts
$ ssh -T git@personal-github
$ ssh -T git@official-github
If the setup is done correctly, you will see these messages
Hi personal-github! You've successfully authenticated, but GitHub does not provide shell access.

Hi official-github! You've successfully authenticated, but GitHub does not provide shell access.
Clone the repository
Now it’s time to clone the repository.
If you’ve set up the hostname with the default github.com, You don’t need to change anything in the SSH URL of the repository.
But if you’ve kept the hostname apart from github.com like in my case, I’ve set it up as personal-github and work-github so I need to update the hostname in my GitHub URL whenever I clone a repo.
git@github.com:nehagupta1504/react-native-basic-project.git

// update this @github.com to your hostname

git@personal-github:nehagupta1504/react-native-basic-project.git
or
git@official-github:nehagupta1504/react-native-basic-project.git
Set up the GitHub configs
$ git config user.email "personal@gmail.com"
$ git config user.name "Neha Gupta"
Now you’re free to use the GitHub as you do it. This configuration is a one-time configuration except for the cloning part. While cloning, you always need to update the hostname from github.com to <your_username>
Don’t forget 🤓 to follow me.
Please do like this post if you enjoyed reading it 📗.
Thanks for the read :)
Also, you can support me and my writings by treating me to a nice virtual cup of coffee ☕️