Part 7: Your First EC2 Instance — From Zero to Web Server in Minutes
Learn how to launch an EC2 instance, pick the right AMI, and deploy a web server — without breaking things.
When I first used EC2 in my previous company, it scared me to my toes. I was always thinking and pressuring myself, what if something went wrong? Will it cost money, will it cost downtime?
I was scared, and now, when I think of it, I laugh at myself. AWS is easy to understand, and launching an EC2 instance is the most basic thing that you can ever know.
Today, I am going to help you launch your first free EC2 instance on AWS. I’ll attach a screenshot of each step so that it’s easier for you.
What is Meant By Launching An EC2 Instance
It basically means you’re spinning up a virtual machine in the cloud, which will run 24/7 (until you stop it) and can host anything — websites, apps, APIs
Launching an EC2 Server Step By Step
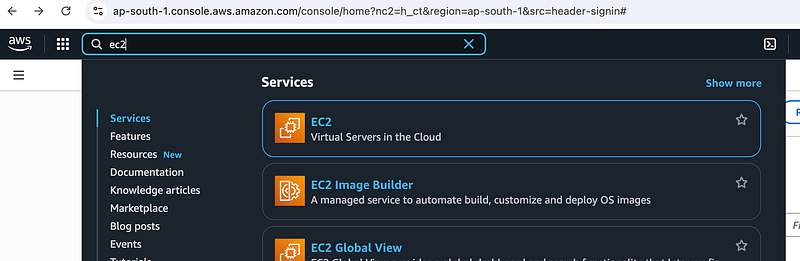
1️⃣. Login/sign up to AWS Management console: If you don’t have an account, you can create one from here. Once logged in, search for EC2 in the search bar, and click on it
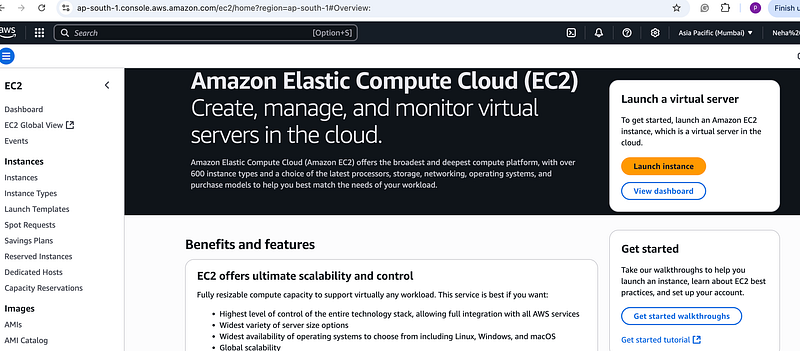
2️⃣. Click on Launch Instance
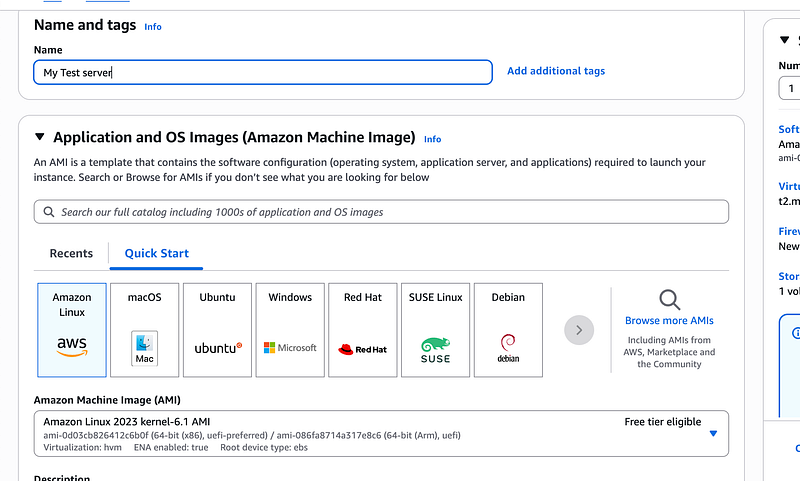
3️⃣. Put the name on your EC2 instance and then select AMI (Amazon Machine Image) for now, let’s go with Amazon Linux. I’ll explain AMIs later in this article.
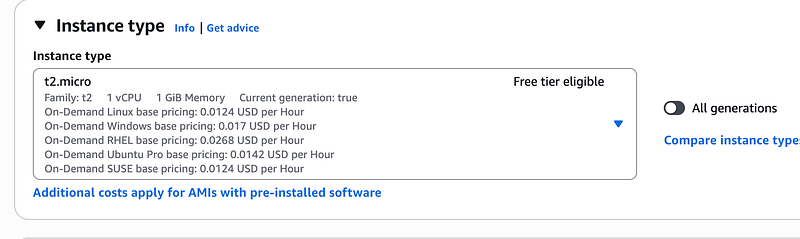
4️⃣. Select Instance type — Select a free one t2.micro (1 vCPU, 1 GB RAM, Free Tier)
5️⃣. Key Pair Setup (proceed with no key pair setup for this one)
Key pairs = SSH access to your machine.
- AWS saves the public key to your instance.
- You download the private key (
.pemfile).
Using this .pem file, you can log into AWS from your machine. Don’t need it right now as I will be using the AWS management console.
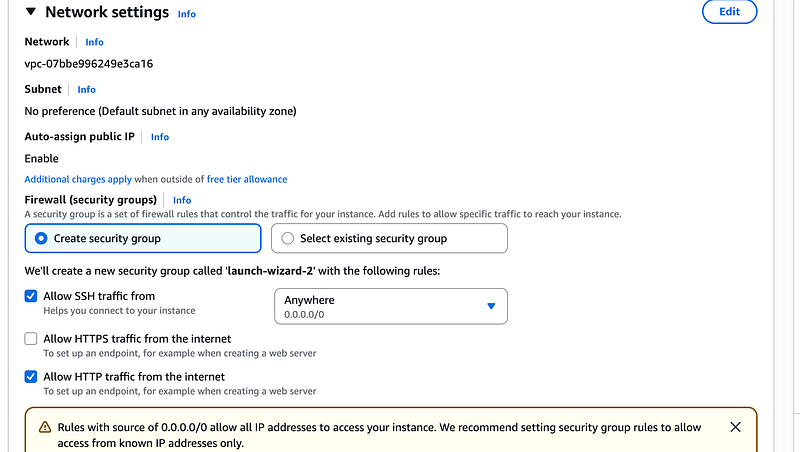
6️⃣. Network Settings (Allow HTTP)
Under firewall rules, allow:
- ✅ HTTP (port 80)
- ✅ SSH (port 22):
This makes your server reachable via browser and lets you SSH in if needed. Rest settings leave as it is.
7️⃣. Add Storage (Default Is Fine): Stick to 8GB gp3 Unless you know you need more.
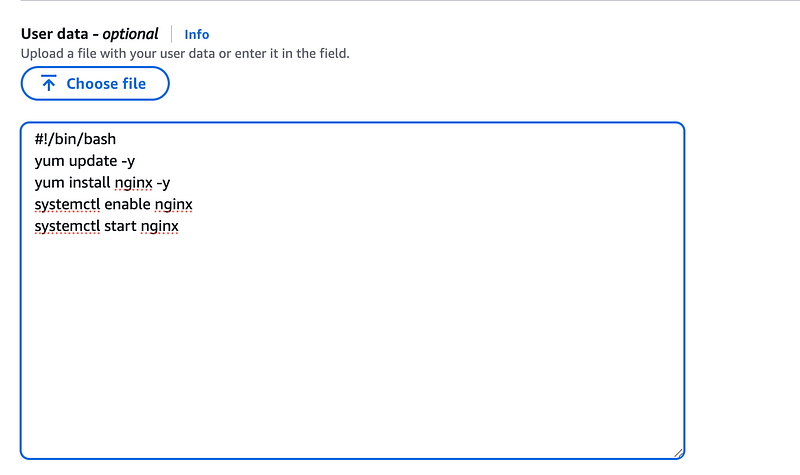
8️⃣. Advanced Settings: We need to run ngnix As the AMI we selected doesn’t have a server activated at launch. Go to Advanced Details, put the shared script in user data so that this bootstraps your server to automatically install and run Nginx, so it’s ready to serve content.
9️⃣. Launching Instance: Click on Launch Instance, and you’ll see that your EC2 instance is up and running.
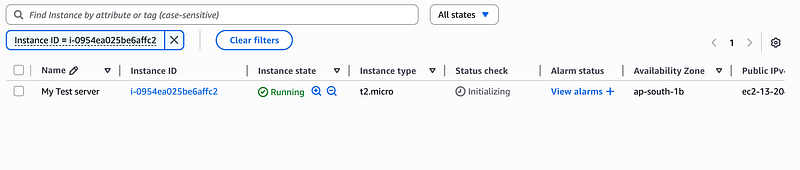
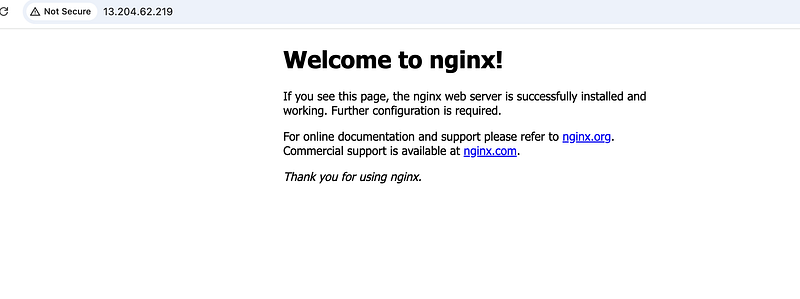
🔟. Testing your web server: Click on Instance ID and copy your public ip and open it in a new tab with http and there you have it! Your very own EC2 instance running a basic web server.
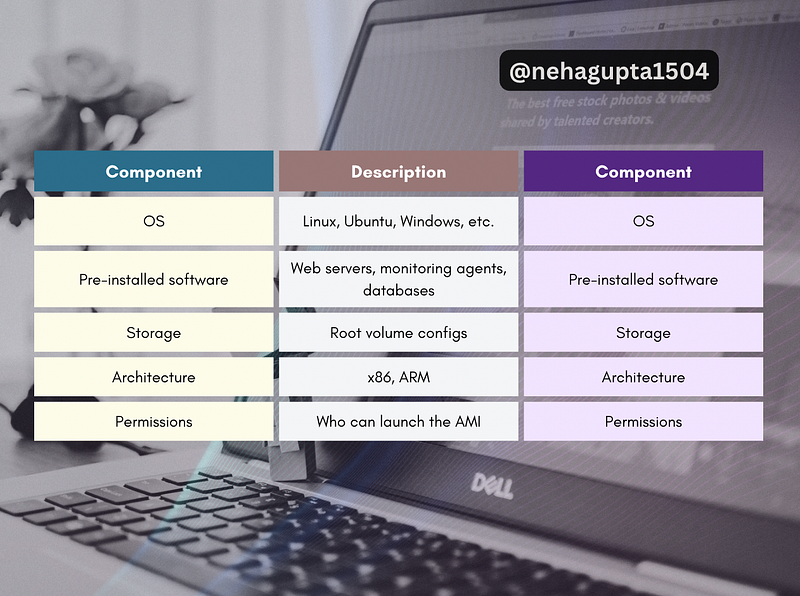
What Is an AMI, Really?
An AMI is a template for your EC2 instance, which will have components like OS, Storage, pre-installed software etc.
Why It Matters:
- You can use one AMI to launch 100 identical EC2s, which can serve as a common template across all your servers.
- Consistency for dev/staging/prod environments
- Reusability = less setup, fewer errors
3 Ways to get AMIs

Real-World Example
Say you’re building a blog CMS.
- You set up one EC2 with Nginx + Node.js + MongoDB.
- You snapshot it as an AMI.
- Now, you can spin up identical servers with a click.
🚀 No reinstalling, no configuring — just deploy.
Coming Up Next
Part 8: Serverless Computing
Over to You:
What’s the first thing you would host on an EC2 instance? A blog? A portfolio? A side project?
Tell me in the comments 👇
Note from Writer’s Side
Thanks for reading. Please do clap and show your support. It motivates me to come up with more interesting articles.
If you like reading my articles, you can always support my writings by buying me a cup of coffee here ☕️ .
Let me take the hot sip and enjoy 😉
At Dev Simplified, We Value Your Feedback 📊
👉 Follow us to not miss any updates.
👉 Have any suggestions? Let us know in the comments!