AWS Series | EC2 Instances | Part I
Introduction to AWS Series
Learning a new technology can be challenging, so I’m creating this AWS series to help people dedicate just 10 minutes a day to learning something valuable. Over time, these small lessons will add up to a fully-fledged skill set.
Note: We’ll mostly rely on free resources for this series.
Introduction to EC2
Elastic Compute Cloud (EC2)
In simple terms, EC2 allows you to rent servers with customizable configurations and compute power. Think of it as renting a house when you move to a new city: you’re uncertain about the duration, so instead of buying, you rent. Similarly, when launching an application, you might not know if it will succeed, so instead of purchasing costly machines, you rent them. EC2 provides this flexibility and simplifies scaling by handling infrastructure.
With AWS infrastructure, you can create a machine and access it remotely over the internet using SSH.
What and How You Configure Your Machine
AWS offers flexibility in configuring EC2 instances:
- Operating System: Linux, Windows, Mac, Ubuntu
- Compute Power: CPUs, RAM, Storage, Network Speed
- Network, Firewall Rules: Security configurations
- Other Options: Further explored in this series.
Creating an EC2 Instance
- Create a Free AWS Account
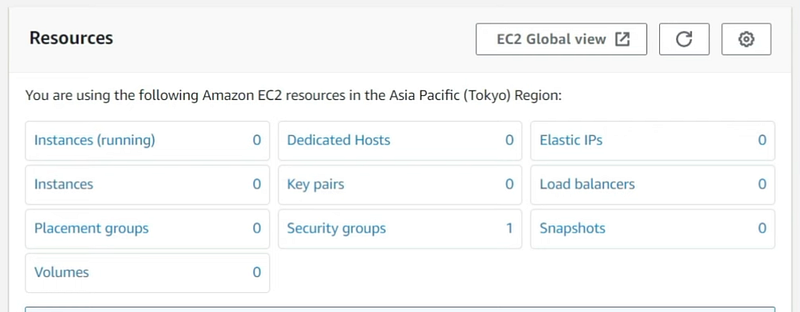
Sign up for AWS using the Free AWS Tier. - Access EC2 on the AWS Dashboard
After logging in, search for EC2. Initially, you’ll see zero running instances.
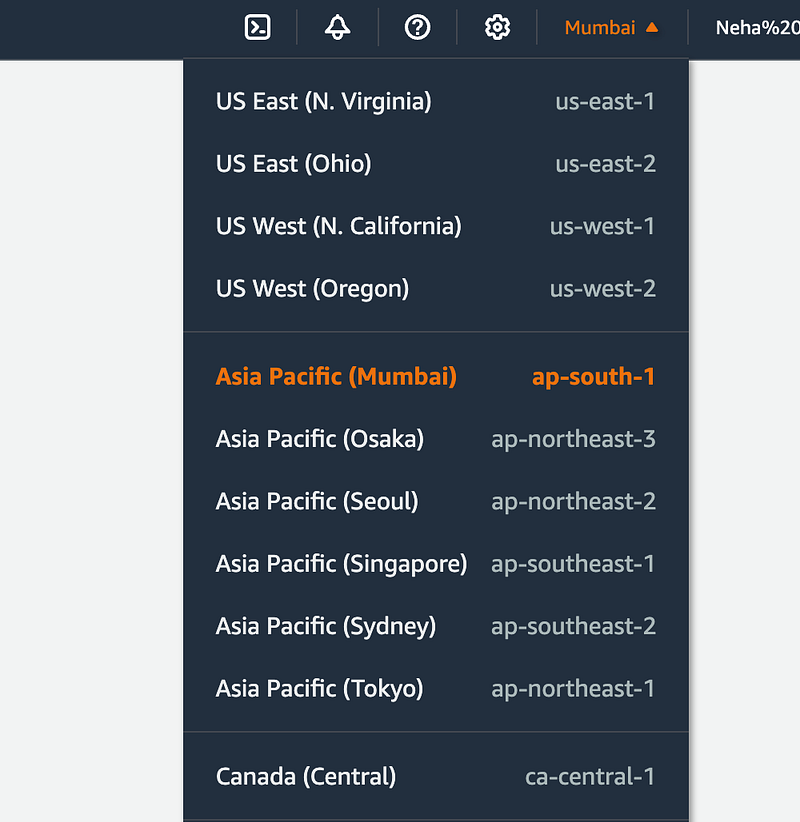
3. Select Region
Choose a region close to your user base. For instance, if most of your users are in India, select Mumbai. Learn more about AWS regions here.
4. Launch an Instance
- Click on Launch Instance to create a new instance.
- Follow these configuration steps:
i. Name Your Instance
You can choose an instance name for your server I am having “neha-gupta-first-instance” as the instance name.
ii. Select OS Image
Choose Ubuntu LTS ARM architecture (Long Term Support). We’ll discuss these options further in this series.

iii. Choose Instance Type
Select based on your needs (CPU, RAM, cost). For now, we’ll use a free option.

iv. Set the Key Pair
— Key pairs allow remote access to your machine. A public key is stored with the instance, while a private key is downloaded to your local machine.
— Name the key pair (e.g., “neha-gupta-first-instance-key”), select RSA as the type, and set the file format to .pem.
— After clicking Create Key Pair, a .pem file will download. This is your private key for SSH access.
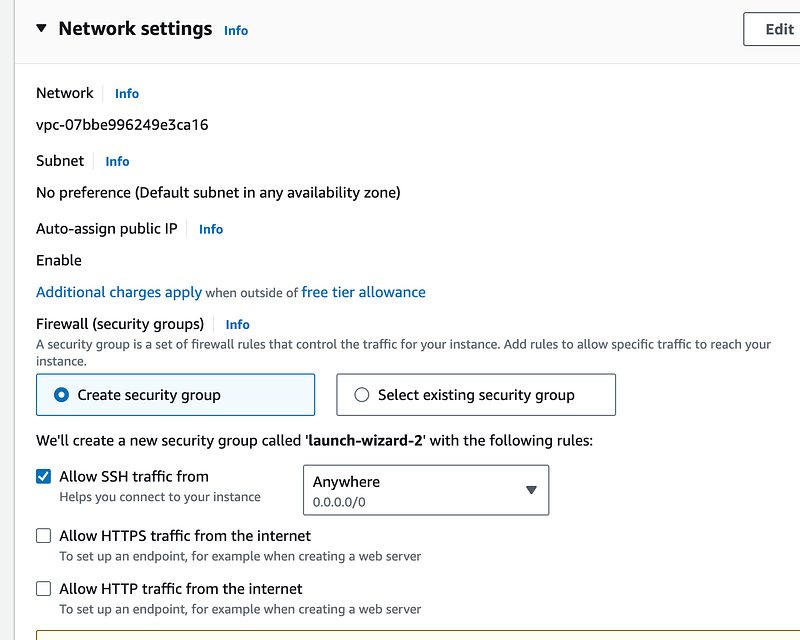
v. Network Settings
- Keep the default settings for now.
- By default, only SSH traffic is allowed from anywhere, though you can restrict access further by adding your machine’s IP instead of 0.0.0.0/0.
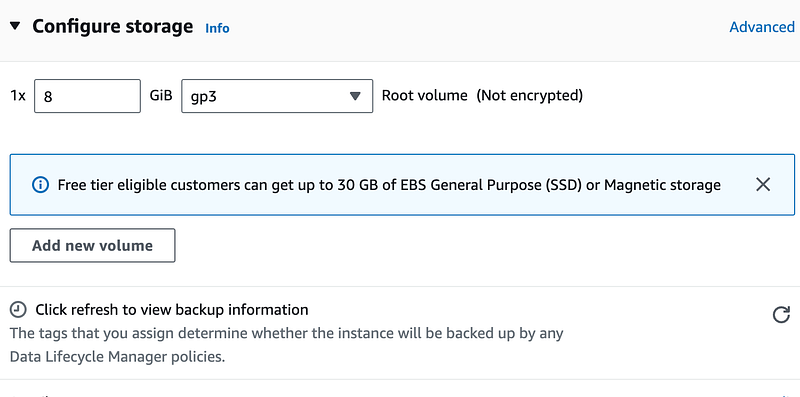
vi. Configure Storage
- Select a storage option, which can be a hard drive or SSD for temporary storage.
vii. Launch Your Instance
- Click Launch Instance. You’ll see a running instance listed under Instances.
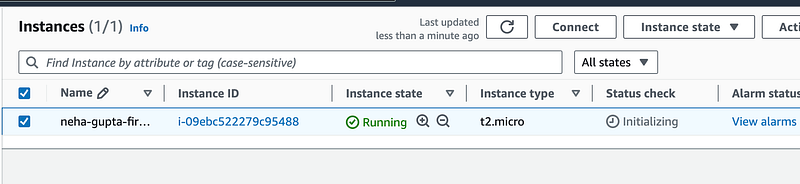
Congratulations!
You’ve successfully created your first EC2 instance. In the next article, we’ll learn how to remotely access this instance.
Thanks for the read :)
Please do like this post if you enjoyed reading it 📗 and also follow for more interesting articles.
You can also support me and my writings by treating me to a nice virtual cup of coffee ☕️.